How to set up your development environment in 2022?

So, let's say you bought a new machine and you want to set it up for better use. Here I would guide you through a setup that I think would be most productive for you while you are starting out programming. This will add value to your work whenever you are creating new applications from scratch and want your setup to look elegant and worthwhile to look at.
After completing this setup you should be able to:
- Get familiar with very powerful yet basic CLI commands that will help you throughout your career.
- Get a good taste of what it feels like to set up a new system from scratch.
- Once done you can finally look at your machine and enjoy using these programs.
Homebrew
Homebrewis a lightweight package manager for Mac and or Linux mainly. You can also use it with WSL although windows already provide aChocolateypackage manager for its files, you can read more on it here .
To set up Homebrew please open up your terminal and paste this command:
/bin/bash -c "$(curl -fsSL https://raw.githubusercontent.com/Homebrew/install/HEAD/install.sh)"
This will go ahead and install all the necessary files for you. The command to access homebrew is brew. It is very powerful for running services in the backend as well as installing the relevant files required for the packages
Github
Github is a version control system. The program uses the technology Git which a lot of people confuse about sometimes.
If you haven't already please go and create your account on GitHub.
Very shortly, Git is the software for tracking changes in any set of files, usually used for coordinating work among programmers collaboratively developing source code during software development. Its goals include speed, data integrity, and support for distributed, non-linear workflows.
While Github is a provider of Internet hosting for software development and version control using Git.
If you got that right we can now go ahead and install Git. While it might be hectic to download the software first and then install it. We can use the homebrew we already set up in 1st step to install it in a single command:
brew install git
Notice how the command says Git and not Github, it's because we want the same version control software that the Github platform is using, on our local machine to watch for changes locally. Hope that made sense.
VS Code (or code editor of your choice)
So, have a package manager with us and we have set up git to track changes. Now let's choose a code editor. One of the very popular ones and extremely user-friendly is VS Code (Visual Studio Code). You can download it from the official website here. The process is very simple.
Once you have gone through that, Here are some recommended plugins for you to make your VS Code awesome, To install these plugins you would have to go to the extensions tab on VS Code.

- Live Server: It will let you run your code in the browser.
- Material Icon Theme: It will make your VS Code file icons look very cool and prominent.
- Prettier: It will format large lines into readable code for you. That you focus on writing code. Pro Tip: you should try format on save by going into the settings (cmd+shift+p) and typing preferences. Inside the preferences on the top search settings type format on save then check the box next to it to enable it. Now every time you save your file, it would be formatted with the default prettier settings.
- Github Theme: This will change your VS Code to a Github-based theme, making code more readable and prominent. You have several options to choose from. I use
Github dark default
With these extensions, you can pretty much configure any basic frontend application and run it perfectly.
Oh My ZSH
This part is totally optional but it is amazing to have a clean terminal. I can never go back to the basic terminal provided by Mac and/or Linux machines.
Use this command to install Oh My ZSH on your system:
$ sh -c "$(curl -fsSL https://raw.github.com/ohmyzsh/ohmyzsh/master/tools/install.sh)"
Once done you can see that your terminal would transform in a way that it is showing more information regarding the directory you are currently on. This is run by a number of themes that ZSH supports. The team has well documented them on their documentation, you can check out the themes page to configure the theme you want to run.
Once you have a theme selected you can go to the root directory of your system, it is usually at /Users/{your_username}/, a cool trick for Mac or Linux users is to type cd ~ to land on the root. Once on the root, enable it to show the hidden files on the directory, the shortcut for that is cmd+shift+..
Now it should show the .zshrc file in the root.

You can right-click it to open it with the text editor. Then search for ZSH_THEME and then change that to whatever you have selected from the themes page. Restart your terminal and see the change in action. 🚀
Bonus (Spaceship Theme)
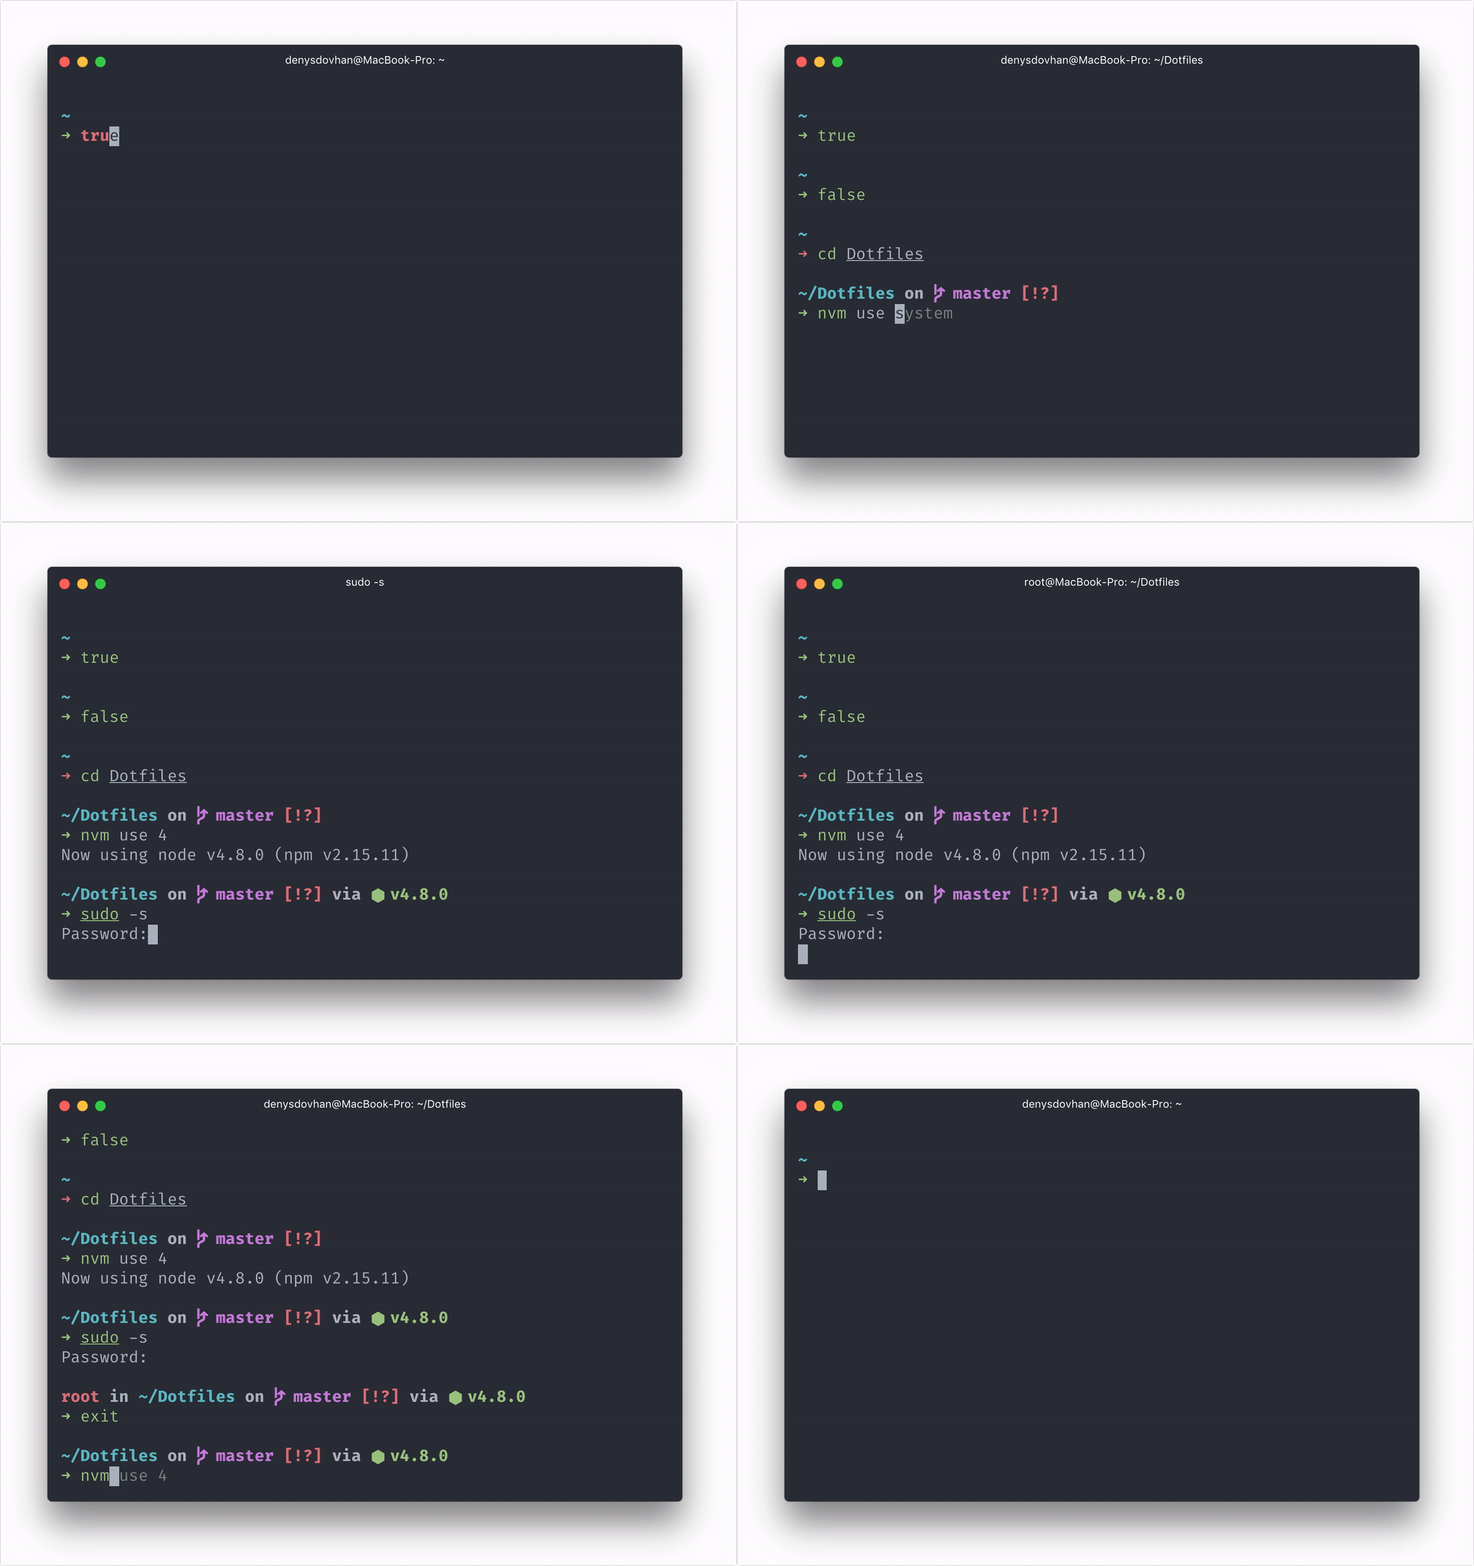
☝️ This is an example from their official Github Readme.
You can install it very easily by following these steps.
First clone the repo:
git clone https://github.com/spaceship-prompt/spaceship-prompt.git "$ZSH_CUSTOM/themes/spaceship-prompt" --depth=1Then link it to ZSH
ln -s "$ZSH_CUSTOM/themes/spaceship-prompt/spaceship.zsh-theme" "$ZSH_CUSTOM/themes/spaceship.zsh-theme"
- Finally following the same step as above, set it in
.zshrcfile:ZSH_THEME="spaceship"
I personally love the spaceship theme, it is very minimal if I'm on a plain folder. However, depending on the project, it can display data like the Node version, Docker version, Package version, Ruby version, etc, etc.
Reload your terminal and you are all set with a modern development setup. 🚀👏
Feel free to reach out to me if you have any queries.